So, in this guide, I will walk you through on how to set up Cordova for android development. Cordova is important as it lets developers develop android apps in HTML, CSS, and Javascript rather than in Java.
Install NVM
To install Cordova we would need NPM. However, if we install only NPM we will be restricted to only one specified version of NPM and that will cause a lot of bottlenecks while developing on a wide variety of Node.js projects. So to manage different versions of Node.js and NPM we have NVM which can switch between different versions of NPM and Node.js. It also installs locally on the home folder of your ubuntu and makes NPM and Node.js also install in the home folder so you will not have to use sudo every time you install, remove or run node packages, which could be a security issue.
To install NVM use this command below:
$ wget -qO- https://raw.githubusercontent.com/nvm-sh/nvm/vX.X.X/install.sh | bash
or
$ curl -o- https://raw.githubusercontent.com/nvm-sh/nvm/vX.X.X/install.sh | bash
Replace vX.X.X with the current version of NVM. At the time of writing this article, the version was v0.39.1 so the command becomes:
$ curl -o- https://raw.githubusercontent.com/nvm-sh/nvm/v0.39.1/install.sh | bash
or
$ wget -qO- https://raw.githubusercontent.com/nvm-sh/nvm/v0.39.1/install.sh | bash
After running the command the output would be like this:
$ wget -qO- https://raw.githubusercontent.com/nvm-sh/nvm/v0.39.1/install.sh | bash
=> Downloading nvm from git to '/home/foobar/.nvm'
=> Cloning into '/home/foobar/.nvm'...
remote: Enumerating objects: 355, done.
remote: Counting objects: 100% (355/355), done.
remote: Compressing objects: 100% (302/302), done.
remote: Total 355 (delta 39), reused 168 (delta 28), pack-reused 0
Receiving objects: 100% (355/355), 208.47 KiB | 606.00 KiB/s, done.
Resolving deltas: 100% (39/39), done.
* (HEAD detached at FETCH_HEAD)
  master
=> Compressing and cleaning up git repository

=> Appending nvm source string to /home/foobar/.bashrc
=> Appending bash_completion source string to /home/foobar/.bashrc
=> Close and reopen your terminal to start using nvm or run the following to use it now:

export NVM_DIR="$HOME/.nvm"
[ -s "$NVM_DIR/nvm.sh" ] && \. "$NVM_DIR/nvm.sh"  # This loads nvm
[ -s "$NVM_DIR/bash_completion" ] && \. "$NVM_DIR/bash_completion"  # This loads nvm bash_completion
The latest node version could be found from here.
Install Node.js and NPM
As we have installed NVM, we now have to install the latest LTS version of NPM and Node.js. To look for the latest version of those, use this command:
$ nvm ls-remote
It will give a long list of versions of Node.js, you don’t need to read all of that, just look at the last output version:
       v16.13.0   (LTS: Gallium)
       v16.13.1   (LTS: Gallium)
       v16.13.2   (LTS: Gallium)
       v16.14.0   (LTS: Gallium)
       v16.14.1   (LTS: Gallium)
       v16.14.2   (LTS: Gallium)
       v16.15.0   (Latest LTS: Gallium)
        v17.0.0
        v17.0.1
        v17.1.0
        v17.2.0
        v17.3.0
        v17.3.1
        v17.4.0
        v17.5.0
        v17.6.0
        v17.7.0
        v17.7.1
        v17.7.2
        v17.8.0
        v17.9.0
        v18.0.0
Here, the Latest LTS is Gallium at the time of writing this article, and its version is v16.15.0, now depending on the future this would change, just keep note of your later LTS Node.js version as we will use it in the next step.
The next step is to install your selected Node.js version. To do that use this command :
nvm install v16.15.0
You have to replace v16.15.0 with the latest LTS Node.js version.
The output of the above command will look something like this:
Downloading and installing node v16.15.0...
Downloading https://nodejs.org/dist/v16.15.0/node-v16.15.0-linux-x64.tar.xz...
######################################################################### 100.0%
Computing checksum with sha256sum
Checksums matched!
Now using node v16.15.0 (npm v8.5.5)
Creating default alias: default -> v16.15.0
After we have installed NPM and Node.js we can go ahead and verify its version by these commands:
foobar@foobar:~$ npm -v
8.5.5
foobar@foobar:~$ node -v
v16.15.0
Install Cordova
We now have NPM and node in our system. Now we can install Cordova. Installing Cordova globally is as easy as installing any Node Package via NPM. We can install Cordova with the following command:
npm install -g cordova
The output of the above command would look like this:
npm WARN deprecated har-validator@5.1.5: this library is no longer supported
npm WARN deprecated request@2.88.2: request has been deprecated, see https://github.com/request/request/issues/3142
npm WARN deprecated uuid@3.4.0: Please upgrade  to version 7 or higher.  Older versions may use Math.random() in certain circumstances, which is known to be problematic.  See https://v8.dev/blog/math-random for details.

added 486 packages, and audited 487 packages in 2m

50 packages are looking for funding
  run `npm fund` for details

found 0 vulnerabilities
npm notice
npm notice New minor version of npm available! 8.5.5 -> 8.8.0
npm notice Changelog: https://github.com/npm/cli/releases/tag/v8.8.0
npm notice Run npm install -g npm@8.8.0 to update!
npm notice
As you can see there are certain warnings and notices, you could ignore this, but if you want to rectify these things, you could install the latest version of Node.js and NPM from NVM.
Note: Do not use the command suggested in the notice which is given after Cordova install and use NVM commands instead as it will manage your Node.Js and NPM versions better.
Making a sample project with Cordova
Okay, so we have managed to install Cordova in our system. Now, let’s go ahead and make a sample Cordova project. We can make a sample Cordova project by the following command:
cordova create hello com.example.hello HelloWorld
The output of the above command will look something like this:
foobar@foobar:~/projects$ cordova create hello com.example.hello HelloWorld
Creating a new cordova project.
Here, hello is the project directory name, com.example.hello is the android package name, and HelloWorld is the app’s name.
Add Platforms for Cordova to build (Android in this case)
The next thing we need to do, is to add the platforms we need to target the app to. For this guide, we will be focusing only on android. So to target a version of android, say android 8 we could do as such:
$ cordova platform add android@8.0.0
The output of the above command would look something like this:
Using cordova-fetch for cordova-android@8.0.0
Adding android project...
Creating Cordova project for the Android platform:
    Path: platforms/android
    Package: com.example.hello
    Name: HelloWorld
    Activity: MainActivity
    Android target: android-28
Subproject Path: CordovaLib
Subproject Path: app
Android project created with cordova-android@8.0.0
Here @8.0.0 tells which version of android we are targeting our app towards. It is best not to target the latest version as many users don’t have the android phone with the latest version of android. Also, do not target it to very old versions of android as well say before android 4 as there are backward compatibility issues.
Checking Build Requirements
Since we have created a sample project of Cordova, let’s go ahead and check the build requirements for android. We could do this by the following command:
$ cordova requirements
While using this command, we would see that many of the requirements are missing as such:
Requirements check results for android:
Java JDK: not installed
Failed to run "javac -version", make sure that you have a JDK version 8 installed.
You can get it from the following location:
https://www.oracle.com/technetwork/java/javase/downloads/jdk8-downloads-2133151.html
Android SDK: not installed
Failed to find 'ANDROID_HOME' environment variable. Try setting it manually.
Failed to find 'android' command in your 'PATH'. Try update your 'PATH' to include path to valid SDK directory.
Android target: not installed
android: Command failed with exit code ENOENT
Gradle: not installed
Could not find gradle wrapper within Android SDK. Could not find Android SDK directory.
Might need to install Android SDK or set up 'ANDROID_HOME' env variable.
Some of requirements check failed
So now let us rectify these, one by one.
Installing pre-requisites for the Android build
Installing Latest JDK
First, we need JDK so that we can install Android Studio. Although, if you install Android Studio from snap you wouldn’t require a JDK, however, you need JDK for Cordova builds as it checks for JDK with javac -version Also, Cordova requires JDK 8 and not the latest JDK too. So as not to limit yourself to other development of Java, I will show you how to have the latest JDK which is version 11 at the time of writing this article, and also JDK 8 for Cordova android development. To install the latest JDK use the following command below:
$ sudo apt install default-jdk
This will install the latest JDK available in Ubuntu repositories which at the time of writing this article was JDK 11. Now we can go ahead and install android studio.
Installing Android Studio
We can install android studio either through apt or snap or from GUI interface “software” application of Ubuntu
Installing Android Studio through apt
The first step we need to do is to add the official repository of the android studio with this command:
$ sudo add-apt-repository ppa:maarten-fonville/android-studio
While running this command, the prompt will want to confirm this action of adding this repository, hit enter to confirm it.
Next update the apt-cache, with this command:
$ sudo apt update
Then install the android studio with this command:
$ sudo apt install android-studio
Installing Android Studio through snap
Installing snap through `snap is a one-liner:
$ sudo snap install android-studio
Installing Android Studio through “Software” Application of Ubuntu
I would recommend this process, as it is the easiest. First, open “Software” from the main menu of Ubuntu or Xubuntu.
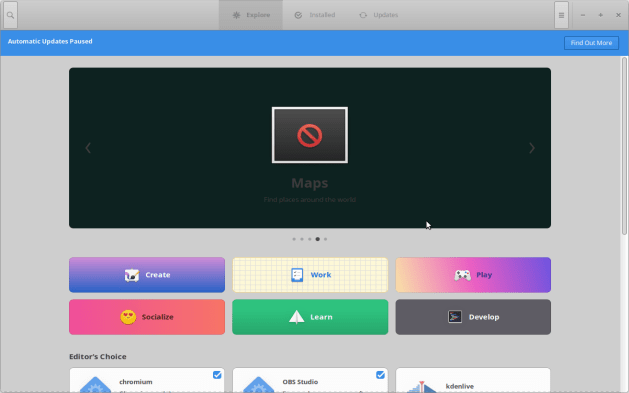
Then pressing CTRL + F :

Then searching “Android Studio” in “Software”:

Select android Studio from the search list:

Click on the install button:

You may need to require to insert the admin password.
And after a few minutes of waiting you will get the android studio installed:

Setting up android studio
After the android studio is installed let’s open up the android studio for its initial setup. After opening android studio you may notice that the android studio didn’t find any android SDK.
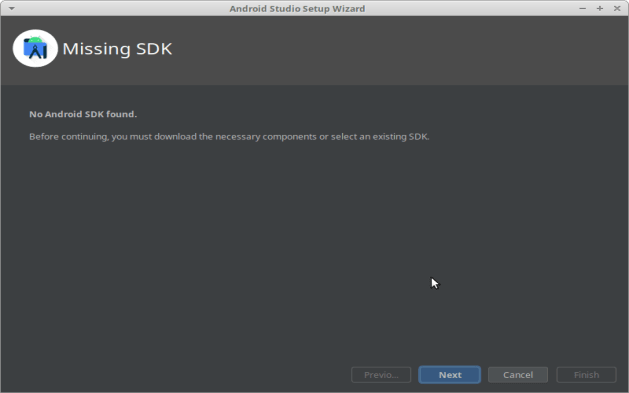
Just click on the Next button:

Note down the Android SDK location, we will have its use later on. Then click on the Next button again.
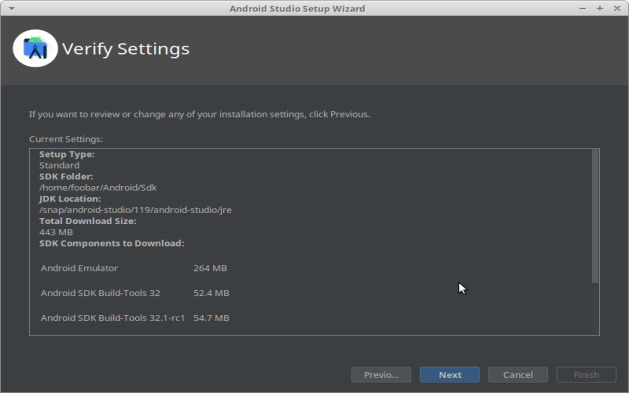
Verify the settings and click on the Next button again:

Accept android SDK License:

Then select android-sdk-preview-license:

Then accept android-sdk-preview-license as well:
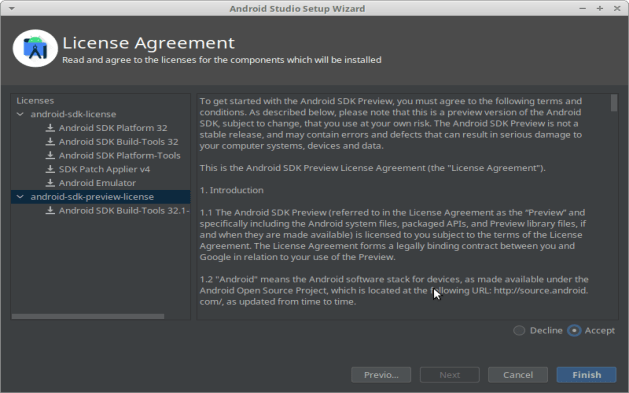
Then click on finish:
If by any chance you missed this step or the android studio didn’t show this wizard automatically, or you canceled it midway, you could select this wizard by going to “More actions”:

Then, in the drop-down menu select SDK manager.
Then click on “edit” at SDK location.
After which you will find the same wizard again.
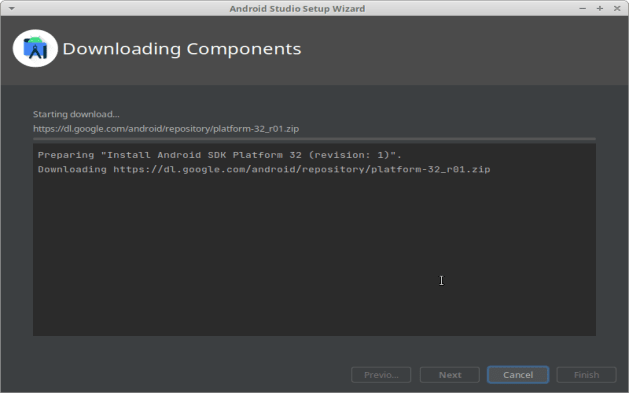
Finally, when the installations are finished click on finish:

Rechecking Cordova requirements
Since we have installed android studio, let’s recheck what Cordova requirements want:
$ cordova requirements
The output of the above commands should come like this:
Requirements check results for android:
Java JDK: not installed
Failed to find 'JAVA_HOME' environment variable. Try setting it manually.
Android SDK: not installed
Failed to find 'ANDROID_HOME' environment variable. Try setting it manually.
Failed to find 'android' command in your 'PATH'. Try update your 'PATH' to include path to valid SDK directory.
Android target: not installed
android: Command failed with exit code ENOENT
Gradle: not installed
Could not find gradle wrapper within Android SDK. Could not find Android SDK directory.
Might need to install Android SDK or set up 'ANDROID_HOME' env variable.
Some of requirements check failed
Even though we have installed JDK and Android Studio, Cordova fails to detect it. This is because the environment variables are not set.
Setting up Java environment variable
First, it says to set the JAVA_HOME variable manually. To do this we need the path of JAVA_HOME
We can get this by the following command:
$ sudo update-alternatives --config java
You will get the output like this:
There are 2 choices for the alternative java (providing /usr/bin/java).

  Selection    Path                                            Priority   Status
------------------------------------------------------------
* 0            /usr/lib/jvm/java-11-openjdk-amd64/bin/java      1111      auto mode
  1            /usr/lib/jvm/java-11-openjdk-amd64/bin/java      1111      manual mode
You have to note down the path of this output.
Next, open ~/.bashrc with any text editor, I prefer vim or vi:
$ vi ~/.bashrc
Go to the bottom of the file and add the following line as per the path:
export JAVA_HOME=/usr/lib/jvm/java-11-openjdk-amd64/bin/java
Without /bin/java in the end.
Save and exit, then type the following command to update your shell environment:
$ source ~/.bashrc
Now running the Cordova environment check again:
$ cordova requirements

Requirements check results for android:
Java JDK: installed 11.0.15
Android SDK: not installed
Failed to find 'ANDROID_HOME' environment variable. Try setting it manually.
Failed to find 'android' command in your 'PATH'. Try update your 'PATH' to include path to valid SDK directory.
Android target: not installed
android: Command failed with exit code ENOENT
Gradle: not installed
Could not find gradle wrapper within Android SDK. Could not find Android SDK directory.
Might need to install Android SDK or set up 'ANDROID_HOME' env variable.
Some of requirements check failed
We see that it now detects the JDK version. However, it still fails to detect our Android SDK.
Setting up ANDROID_HOME variable for Android SDK
While installing Android SDK, in setting up of Android Studio we have noted down the path of Android SDK we will now use that here.
So the path for me was:
home/foobar/Android/Sdk
We could use a variable $HOME to avoid writing the user folder name directly into ~/.bashrc.
So, again we open up the file with vim:
$ vi ~/.bashrc
And add the following line at the end of the file:
export ANDROID_HOME="$HOME/Android/Sdk"
Then update our shell environment:
$ source ~/.bashrc
Now let’s check the Cordova requirements again.
foobar@foobar:~/projects/hello$ cordova requirements

Requirements check results for android:
Java JDK: installed 11.0.15
Android SDK: installed true
Android target: not installed
android: Command failed with exit code ENOENT
Gradle: not installed
Could not find an installed version of Gradle either in Android Studio,
or on your system to install the gradle wrapper. Please include gradle
in your path, or install Android Studio
Some of requirements check failed
As we can see now that it detects the Android SDK version but the JDK version for android 8 and 9 is JDK 8, and for android 10 and above it’s JDK 11. So, for older androids, we need to install JDK 8
Installation and configuring of JDK 8
To install JDK 8 along with JDK 11 we can use this command:
$ sudo apt install openjdk-8-jdk
It will ask for a confirmation, enter y, and press enter.
After it is installed we have to get its path by:
$ sudo update-alternatives --config java
The output of the above command would be something like this:
There are 2 choices for the alternative java (providing /usr/bin/java).

  Selection    Path                                            Priority   Status
------------------------------------------------------------
* 0            /usr/lib/jvm/java-11-openjdk-amd64/bin/java      1111      auto mode
  1            /usr/lib/jvm/java-11-openjdk-amd64/bin/java      1111      manual mode
  2            /usr/lib/jvm/java-8-openjdk-amd64/jre/bin/java   1081      manual mode

Press <enter> to keep the current choice[*], or type selection number:
Copy the path of JDK 8 as we will use it in replacing the value of JAVA_HOME in ~/.bashrc.
Once copied, replace the line:
export JAVA_HOME=/usr/lib/jvm/java-11-openjdk-amd64
in ~/.bashrc with this:
export JAVA_HOME=/usr/lib/jvm/java-8-openjdk-amd64
Without the /jre/bin/java part in the end. Then save and quit vim.
After that update the environment variables again:
$ source ~/.bashrc
Now, let’s check the Cordova requirements again:
$ cordova requirements
Here, we see that our changes have no effect:
Requirements check results for android:
Java JDK: installed 11.0.15
Android SDK: installed true
Android target: not installed
android: Command failed with exit code ENOENT
Gradle: not installed
Could not find an installed version of Gradle either in Android Studio,
or on your system to install the gradle wrapper. Please include gradle
in your path, or install Android Studio
Some of requirements check failed
To rectify this, we have to adjust one thing in our system, as to what to use as the default java version from JDK 11 to JDK 8.
To do this we use the command:
$ sudo update-alternatives --config java
Then select the option that corresponds to JDK 8:
There are 2 choices for the alternative java (providing /usr/bin/java).

  Selection    Path                                            Priority   Status
------------------------------------------------------------
* 0            /usr/lib/jvm/java-11-openjdk-amd64/bin/java      1111      auto mode
  1            /usr/lib/jvm/java-11-openjdk-amd64/bin/java      1111      manual mode
  2            /usr/lib/jvm/java-8-openjdk-amd64/jre/bin/java   1081      manual mode

Press <enter> to keep the current choice[*], or type selection number: 2
update-alternatives: using /usr/lib/jvm/java-8-openjdk-amd64/jre/bin/java to provide /usr/bin/java (java) in manual mode
If we check the Cordova requirements now, there is still no change:
foobar@foobar:~/projects/hello$ cordova requirements

Requirements check results for android:
Java JDK: installed 11.0.15
Android SDK: installed true
Android target: not installed
android: Command failed with exit code ENOENT
Gradle: not installed
Could not find an installed version of Gradle either in Android Studio,
or on your system to install the gradle wrapper. Please include gradle
in your path, or install Android Studio
Some of requirements check failed
As we have one last configuration to change, that is of javac, along with java so we use the command:
sudo update-alternatives --config javac
this time and select the JDK 8 from the options given:
There are 2 choices for the alternative javac (providing /usr/bin/javac).

  Selection    Path                                          Priority   Status
------------------------------------------------------------
* 0            /usr/lib/jvm/java-11-openjdk-amd64/bin/javac   1111      auto mode
  1            /usr/lib/jvm/java-11-openjdk-amd64/bin/javac   1111      manual mode
  2            /usr/lib/jvm/java-8-openjdk-amd64/bin/javac    1081      manual mode

Press <enter> to keep the current choice[*], or type selection number: 2
update-alternatives: using /usr/lib/jvm/java-8-openjdk-amd64/bin/javac to provide /usr/bin/javac (javac) in manual mode
Now when we check the Cordova requirements, we see that we have a change in the version of JDK:
foobar@foobar:~/projects/hello$ cordova requirements

Requirements check results for android:
Java JDK: installed 1.8.0
Android SDK: installed true
Android target: not installed
android: Command failed with exit code ENOENT
Gradle: not installed
Could not find an installed version of Gradle either in Android Studio,
or on your system to install the gradle wrapper. Please include gradle
in your path, or install Android Studio
Some of requirements check failed
However, it still says that the android target is not installed. To fix this we need to go back to Android studio.
Installing Android Targets
To install Android targets we have to first open the Android studio:

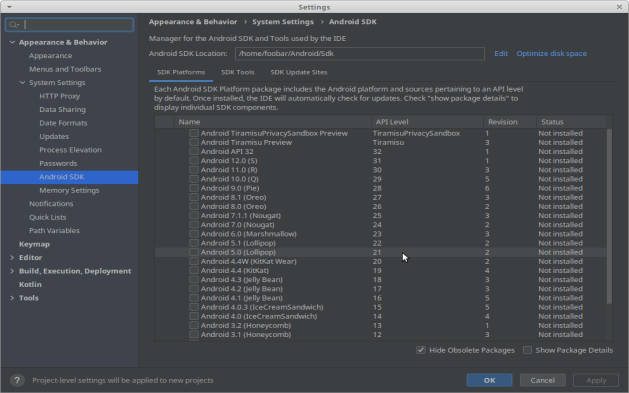
Then we have to select “SDK Manager” from “more actions”:

And in the SDK platforms sections, we have to select from Android 8 to 12.
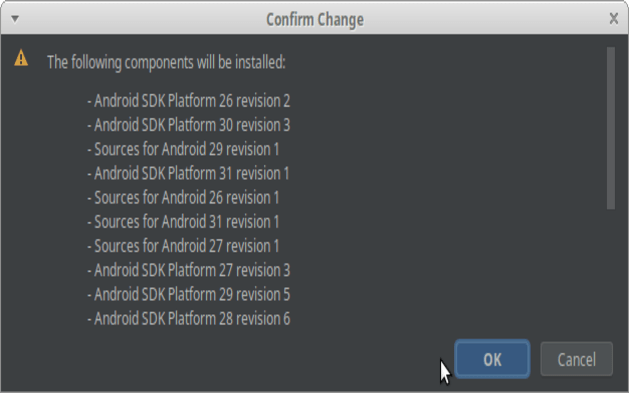
Then confirm the components to be installed, and click okay.
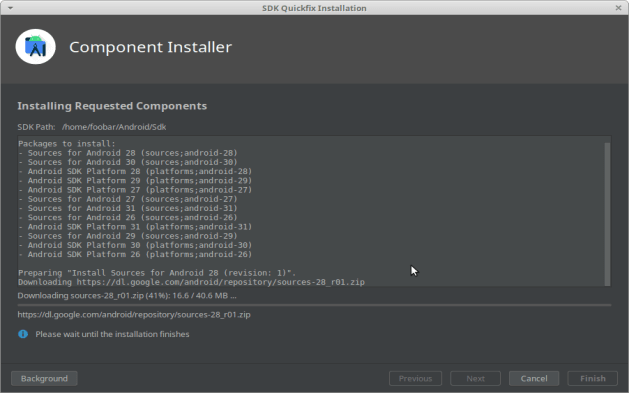
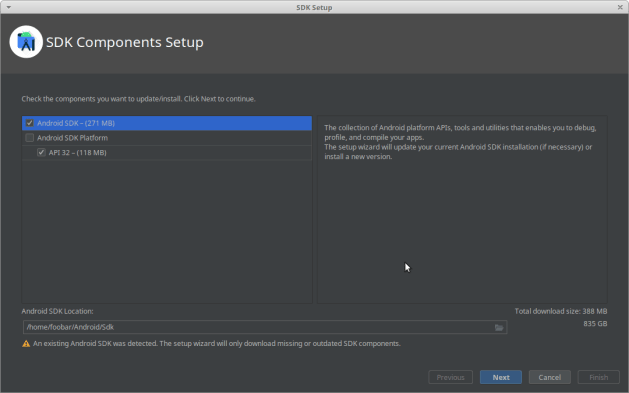
In the end, you will get a wizard that will install all the components.
Adding more environment variables
After, adding the android platforms from the wizard, we need to add proper variables so that Cordova could detect them. So the first variable is ANDROID_SDK_ROOT whose value will be the same as ANDROID_HOME
So in the~/.bashrc file, we need to add this line in the last:
export ANDROID_SDK_ROOT="$HOME/Android/Sdk"
After this is added, we need to add these paths to our .bashrc file.
export PATH=$PATH:$ANDROID_SDK_ROOT/platform-tools/
export PATH=$PATH:$ANDROID_SDK_ROOT/cmdline-tools/latest/bin/
export PATH=$PATH:$ANDROID_SDK_ROOT/emulator/
export PATH=$PATH:$ANDROID_SDK_ROOT/platforms/
Installing the latest Gradle
To install the latest Gradle we have to got to download the binary from here
After downloading Gradle we have to go to the folder where it is downloaded then follow these commands to extract it into the system
$ mkdir /opt/gradle
$ unzip -d /opt/gradle gradle-7.4.2-bin.zip
$ ls /opt/gradle/gradle-7.4.2
And lastly, we have to make a path in .bashrc file so that Cordova could detect the latest Gradle. Add these lines to ~/.bashrc:
export PATH="$PATH:/opt/gradle/gradle-7.4.2/bin"
After installing it, check if you get its version or not:
$ gradle -v
------------------------------------------------------------
Gradle 7.4.2
------------------------------------------------------------

Build time:   2022-03-31 15:25:29 UTC
Revision:     540473b8118064efcc264694cbcaa4b677f61041

Kotlin:       1.5.31
Groovy:       3.0.9
Ant:          Apache Ant(TM) version 1.10.11 compiled on July 10 2021
JVM:          1.8.0_312 (Private Build 25.312-b07)
OS:           Linux 5.15.0-28-generic amd64
If you don’t and get an error message that “JAVA_HOME” is invalid. Run this command to get the current JAVA_HOME:
java -XshowSettings:properties -version 2>&1 > /dev/null | grep 'java.home'
It should print something like this:
java.home = /usr/lib/jvm/java-8-openjdk-amd64/jre
Add this to your JAVA_HOME variable in .bashrc file.
Building your project
You could build your projects with this command:
$ cordova build
In the end, the output should be like this:
BUILD SUCCESSFUL in 33s
42 actionable tasks: 42 executed
Built the following apk(s):
  /home/foobar/projects/hello/platforms/android/app/build/outputs/apk/debug/app-debug.apk
Running your project in the emulator
If you run:
$ cordova emulate
To run the project in the emulator you will find this error:
Checking Java JDK and Android SDK versions
ANDROID_SDK_ROOT=/home/foobar/Android/Sdk (recommended setting)
ANDROID_HOME=/home/foobar/Android/Sdk (DEPRECATED)
Could not find either `android` or `avdmanager` on your $PATH! Are you sure the Android SDK is installed and available?
However, if you check the paths, we have all the paths:
export JAVA_HOME="/usr/lib/jvm/java-8-openjdk-amd64/jre"
export ANDROID_SDK_ROOT="$HOME/Android/Sdk"
export ANDROID_HOME="$HOME/Android/Sdk"
export PATH="$PATH:$ANDROID_SDK_ROOT/platform-tools/"
export PATH="$PATH:$ANDROID_SDK_ROOT/cmdline-tools/latest/bin/"
export PATH="$PATH:$ANDROID_SDK_ROOT/emulator/"
export PATH="$PATH:$ANDROID_SDK_ROOT/platforms/"
export PATH="$PATH:/opt/gradle/gradle-7.4.2/bin"
But we don’t have the cmdline-tools folder which also has android tool which will be asked still if we check Cordova Requirements:
Requirements check results for android:
Java JDK: installed 1.8.0
Android SDK: installed true
Android target: not installed
android: Command failed with exit code ENOENT
Gradle: installed /opt/gradle/gradle-7.4.2/bin/gradle
Some of requirements check failed
Also, the android target is not shown even though we have installed the android targets android studio.
To fix this, we need to open android studio again.

Then we have to the SDK manager from “more actions”:

Go to the SDK tools tab:

Check the Android SDK command-line tools option:
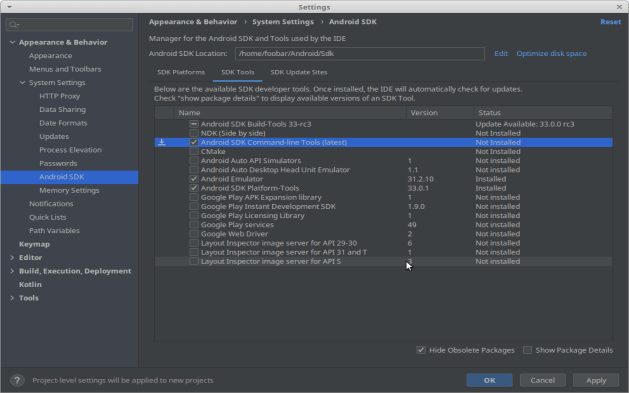
Then click on Okay:

And now when we check the Cordova Requirements, we see that every requirement is met:
$ cordova requirements
Requirements check results for android:
Java JDK: installed 1.8.0
Android SDK: installed true
Android target: installed android-32,android-31,android-30,android-29,android-28,android-27
Gradle: installed /opt/gradle/gradle-7.4.2/bin/gradle
Now, let’s go ahead and run the emulation:
$ cordova emulate
While running the above command we would find such issue:
1. Download desired System Image by running: /home/foobar/Android/Sdk/cmdline-tools/latest/bin/sdkmanager sdk
2. Create an AVD by running: /home/foobar/Android/Sdk/cmdline-tools/latest/bin/sdkmanager avd
HINT: For a faster emulator, use an Intel System Image and install the HAXM device driver
That it doesn’t have an AVD. We could go ahead and install AVD from the command line but it is much easier to do with Android Studio.
So first we will open the android studio:

Then click on more actions and then click on virtual device manager:

Then in the top left corner click on create device button:
After that select hardware such as Pixel 2:

Then click the Next button in the wizard
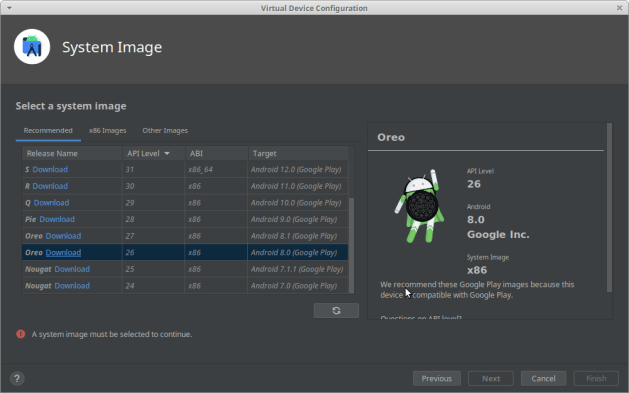
In the system image click download oreo.

Then select Oreo and click on the Next button in the wizard:

Now, verify the configuration of the device, and lastly click on finish:

If everything is okay you will get a device like this:

After this is done we can close the android studio and go back to Cordova and try to emulate the project again:
$ cordova emulate
It will give us a result as such:

Development
We can now easily develop this app with just HTML, Javascript, and CSS by editing the contents of www folder.
foobar@foobar:~/projects/hello$ ls www
css  img  index.html  js
Further stuff such as how to set up splash screen and Icons for the app would be covered in later posts.